
VMO strengthening exercises can play a key role in getting your knees working pain-free. Whether you’ve got general achy knees or been diagnosed with a condition like patellar tendonitis, quad tendonitis meniscus tear, ACL tears, or osteoarthritis, activating your quadriceps (especially your VMO) should be your first priority.
In this article, you’ll learn the function of the vastus medialis, why it’s important, and then four exercises to activate the quads, specifically the VMO – the medial aspect of the quadriceps.
It’ll keep your knees healthier and help to fix any pain or problems you have now. Then, for extra quad mobility, try The Only 3 Quadricep Stretches You Need for Flexible Quads.
No time like now to start, so let’s go.
How to Activate the VMO
Now, if you’ve been reading these articles for a while, you know that there’s a follow-along video to see how the movements should look: 4 Quadriceps (VMO) Strengthening Exercises for Painful Knees
Coach E says:
I used to believe that the VMO (the medical aspect of the quads) wasn’t actually that important for healthy knees.
I’d read some studies, did some thinking, heard some things from people that I learned from, and that’s the stance that I took for a while.
Then I learned two things. One was when there’s swelling in the knee – let’s say you’re running and you tweak your knee, maybe a torn meniscus, and you get swelling in the knee – atrophy of the quads can start to occur within 24 hours.
That goes to show you that if you’ve ever had a swollen knee that you really need to make sure that you get the quadriceps activated and firing as soon as possible – as soon as humanly possible.
We do that really quickly, within 24 hours for sure in our programs.
The second thing was that doctors should have patients activating their quads in the recovery room after performing surgery.
It’s so, so important to get them firing and to keep that strength there.
Why would you want to get your VMO firing in the recovery room and right after the injury?
Because you want to be able to achieve terminal knee extension, that means full knee extension where the knee is locked out (not hyper-extended for you hypermobile folks) but full knee extension with active quadriceps firing.
When you have that, you make sure that you get good blood flow and you load the knee properly.
If you can’t achieve terminal knee extension, every step you take puts more wear and tear on the cartilage. Over time, the passive tissues in the knee will show signs of premature degeneration. That can lead to early osteoarthritis.
So keep the quads active and strong! Maintain that terminal knee extension, which is what they do.
Your knees will thank you for it.
Now one more quick detour before the exercises because understanding your anatomy will help you stay mobile long-term. (Don’t worry, there’s no quiz.)
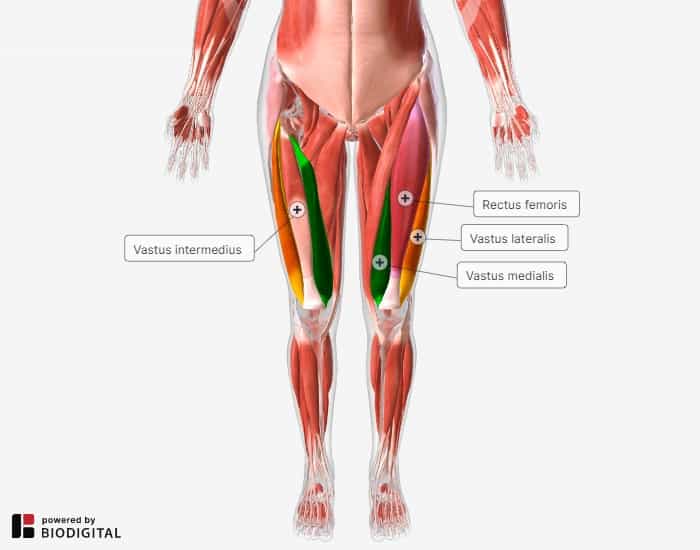
Anatomy of the VMO
Here’s a quick anatomy primer for you.
There are four heads to the quadriceps.
- Vastus medialis oblique
- Lateralis oblique
- Rectus femoris
- Vastus intermedius
Before we get to the four exercises, here’s some properly peer-reviewed research to corroborate what I’m saying above:
The study called “Do Pre-operative Vastus Medialis Volume and Quality Affect Functional Outcomes After Total Knee Arthroplasty” was published in 2022. They concluded that increased vastus medialis fat infiltration is associated with worse functional outcomes. [1]
After the total knee surgery, preserving vastus medialis quality could improve functional outcomes and surgeons should encourage patients to perform quadriceps strengthening exercises before surgery, and, I believe, as soon as possible after surgery.
Up next, how to strengthen the vastus medialis.
VMO Strengthening Exercises
The best way to get the most out of your time is start by taking these exercises slow. Don’t worry about the number of sets or reps so much at first. Get the movement precise, activate your muscles in order, slowly release instead of dropping an activation, and always, always breathe.
Now, let’s get to the exercises.
Exercise 1: ASMR Quads
First, we’ll address tissue quality to ensure that the quads and the tendons have pliability and can move properly. We also want them to have good blood flow.
You’ll need a foam roller for this.
You may have seen foam rolling before, particularly of the quads, but we added a little tweak, which is why we called it “active self-myofascial release.”
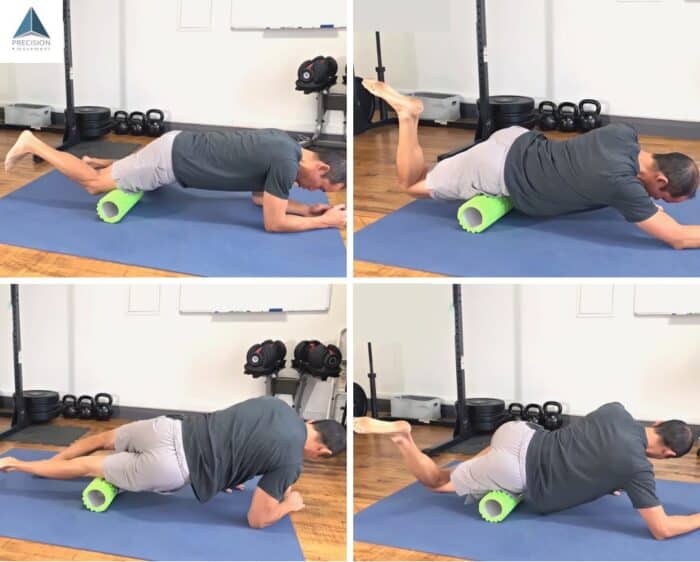
- Get on your hands and knees (use a yoga mat if that’s more comfortable)
- Start with the foam roller above the knee
- Put your weight into it and roll down as you flex your knee (heel to butt)
- When you reach your hip, reset
The active component (moving your heel toward your butt) activates your hammies. It lengthens and shuts off the quadriceps, allowing you to get deeper.
Go nice and slow. If you find a tender spot (aka hot spot) where it’s really painful, stay there for just a moment. Breathe. Try to melt the muscle over the roller, and then continue flexing the knee as you roll up towards the hip.
Change the angle of your body. You can go to the outside, toward the IT band. If you go on your side, continue to flex the knee. That will help lengthen the quads and separate the vastus lateralis from the IT band.
Change it up, working one or two minutes per leg.
That will help restore proper tissue quality. Do it every day for up to two weeks. At that point, you could drop down to 3-4 days a week for two or four weeks. Keep going to the point where you’re at once a week, and maintaining that will help you maintain good tissue quality.
Now, foam rolling has gotten a bit of a bad rap. Some people say that it’s useless, doesn’t work, and there’s always new research coming out.
Coach E says:
“I’ve found just from personal experience that it feels good and it just feels looser. I get a little less tension in the muscles. Massages are good. Everybody loves massages, so this is basically a massage you can give to yourself.”
We also found a study showing a mechanism that might prove foam rolling especially benefits for fixing quadriceps function. This study looks at “The Effect of Self-Myofascial Release on the Pennation Angle of the Vastus Medialis Oblique and the Vastus Lateralis in Athletic Male Individuals: An Ultrasound Investigation.” That’s the angle of the fibers as they go into the quadriceps tendon.
After a 7-week program where participants performed foam rolling three times a week, they found there was a significant decrease in pennation angle. While there’s no clinical significance shown because these were asymptomatic participants, it shows that self-myofascial release does indeed affect the tissue quality. [2]
Exercise 2: Prone Hip Extension
The second exercise is called Gross Activation. It just gets everything firing nice and strong.
This is the prone hip extension – lie prone, down on your stomach. All you’re going to do is activate the glutes and straighten the knee.
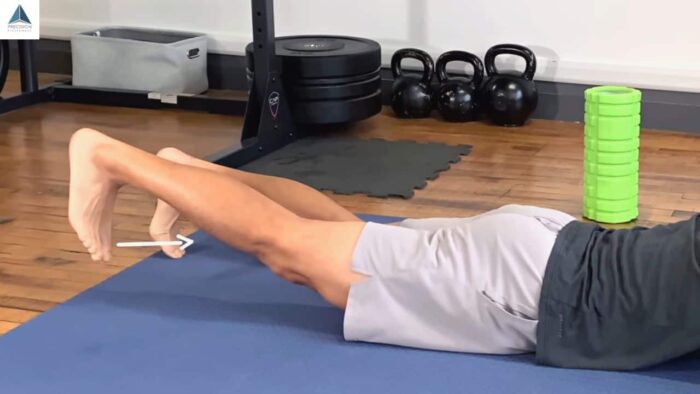
- Lay on your stomach
- Activate the glutes and straighten your knee
- Get it to terminal extension, then dorsiflex the ankle – pull the ball of your foot toward your knee
- Hold that strong activation with a straight knee for 30 seconds
- Lower your leg slowly, keeping everything on, then gradually relax
Repeat for 3 reps per side, holding for 30 seconds. Alternate left, right, left, right, etc. That’ll help mitigate some of the fatigue.
Really try to fire everything, glutes, quads, hamstrings, calves, and tibialis anterior. You’re trying to get deeper into dorsiflexion, deeper into hip extension, but keep your low back, neck, and shoulders relaxed. That can be hard to do at first, but you’ll get it.
Breathe. It’ll get tiring. Focus on the terminal extension straight locked out knee.
We want to make sure that we have all of the heads going, not just the VMO. We need all of the heads of the quads going, and this exercise will help to make sure that they’re all fired up.
Exercise 3: Extended Knee Ankle FL-EX
The third exercise is now going to work on precise activation. So here we’re going back to a bit of anatomy to show you this is what VMO activation looks like.
You can see the area that starts to swell up and contract.
That is improper activation for this exercise. See how the rectus femoris and vastus lateralis activate first. That’s what we don’t want.
The goal here is to prioritize the VMO going first, and it stays on throughout. It will help you develop control and awareness of your muscle.
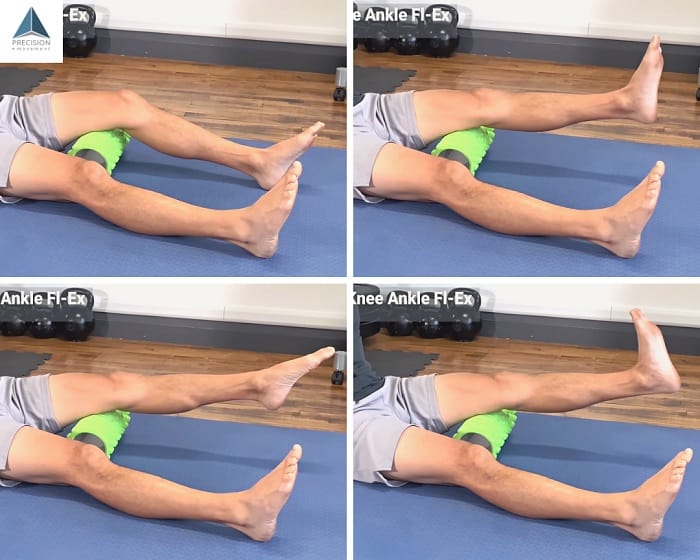
- Sit on the ground with a foam roller under your thigh
- Start off ramping up VMO activation gradually
- Straighten the knee slowly (feel that VMO!)
- At terminal extension (locked out) plant your foot
- Flex at the ankles using the ball of your foot to point, not your toes
- Hold 10 seconds
- Slowly move to dorsiflexion, pulling the ball of your foot toward your shin
- Hold for 10 seconds
- Return to neutral, keeping everything on
- Lower to the floor, then slowly ramp down activation
This is a very precise activation, getting the VMO activated first and maintaining it throughout the exercise.
This one is great if you’ve got achy knees.
Exercise 4: VMO Lunge
There’s one exercise to do right away and regularly if you have knee pain. It’ll maintain good function, and it’s almost like taking a painkiller when you do this one.
It’ll drop your pain level down a few notches and even get you walking straight without a limp.
This is the process of what we call functional integration.
So we’re going to integrate what we fixed up, which in this case, was VMO activation and terminal extension range. We’re going to integrate that into a movement pattern that we use.
In this case, it will be a lunge. But you can also do it for squats, hinges, or any kind of movement pattern, really.
For this exercise, we’re going to take a split stance to start off. We’re going to go really deep into the lunge. Use support if you need it, but if you can do it without, that’s good too.
Now, with functional integration, we want to make sure we’ve got everything working well. In this case, I’m going to activate the short and skinny foot. That’s one way to think of activating the arch in your foot – try to make your foot shorter and narrow to turn on those muscles.
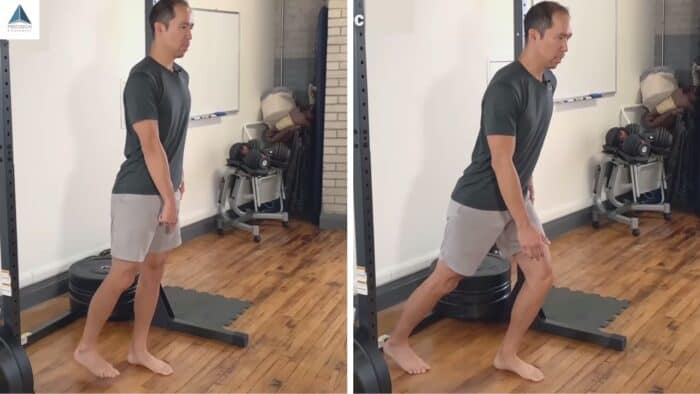
- Start with a split stance
- Push through the metatarsals (the ball of your foot, not your toes)
- Make the foot skinner and shorter, pulling the forefoot towards your heel
- Take your weight off your back foot (balance on your front foot)
- Hold terminal extension in the quads for 5 seconds
- Lower your back foot, maintaining VMO/quad activation
- Relax
Perform 3-6 reps and 2-3 sets.
That will help you create those neuromuscular patterns. It helps your brain learn to activate muscles in sequence so that you can transfer the movement anywhere – the gym, sports, maybe you do lunges for fun around your house.
The Next Step to Beat Achy Knees
Those are the four exercises to get your quadriceps (specifically your VMO) active and strong. Hopefully, you like them or at least learned something new that will get your knees to a more mobile place.
If, after a couple of weeks of these VMO strengthening exercises, you want to take the next step in eliminating wear and tear knee pain, check out our program called the Knee Pain Solution. This is our latest comprehensive approach to make sure you can rehab painful knees and prevent pain from happening in the future.
Keep moving.