
Tight hip flexors have become a big problem thanks to all the hours we spend sitting. Beyond helping you pack on the pounds, this habit degrades your mobility.
Tightness or dysfunction in the hip flexors can affect our ability to perform just about any movement pattern we want to – whether that’s squatting in the gym, playing with the kids, or going for a run.
But I’ve got 2 simple and unique steps that will completely change your hip flexor strength, mobility, and function. And hopefully make up for all that sitting.
The Anatomy of Hip Flexor Tightness
Today we’re going to focus on the iliopsoas, which is actually 2 muscles – the iliacus and the psoas – that merge together near their insertion.
The iliacus runs along the crest of your pelvis – near your hip bone. The psoas major originates higher up – on the vertebrae of your lumbar spine. These muscles join together as they insert onto your femur [1].
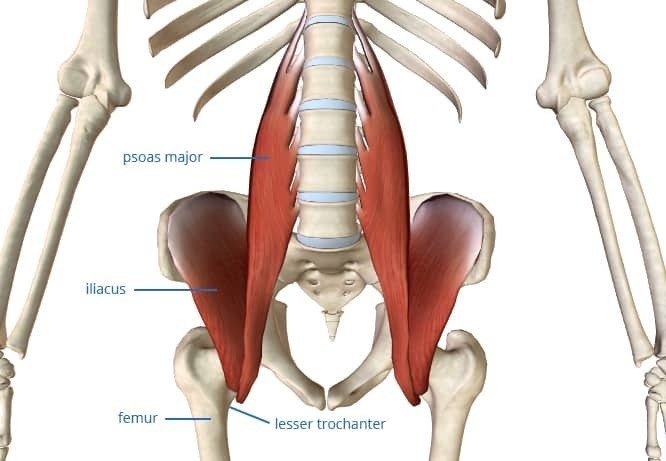
When your iliopsoas contracts, it flexes the femur and brings your thigh toward your torso. When we sit at work, in the car or at home on the couch – we are in a flexed hip position, with the iliopsoas in a shortened position.
Because we spend so much time sitting, these muscles adapt to this shortened position and can restrict not only hip extension (lengthened), but also hip flexion due to the muscles not having to fire when to get you into the shortened position you are in when you sit, causing them to weaken at this range.

Another point that’s often misunderstood is the psoas’ impact on the lumbar spine. Because it originates on your lumbar spine, changes in its tone or function have effect the spine.
One example is when you drop down into a squat – hip flexors that have poor activation at the shortened length can cause butt wink since they must be active to keep the lumbar spine in neutral/slight extension and if their ability to activate has diminished due to adapting to sitting, they’ll shut off at the bottom of the squat resulting in lumbar spine flexion and posterior pelvic tilt.
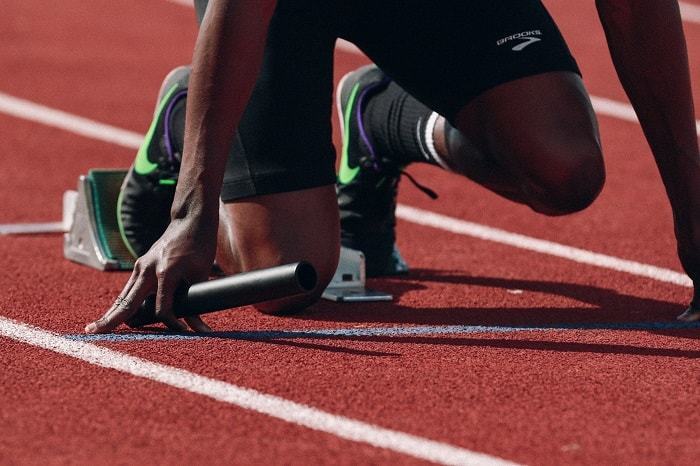
Another example is with running – when you’re toeing off that hip needs to extend and poor extensibility in the iliopsoas will limit hip extension range and thus stride length.

If you’re restricted here, your body will simply find somewhere to compensate and your lumbar spine will be pulled out of neutral and into extension. Which is a recipe for disaster in the form of injuries, aches, and pains.
Looking at the research, it’s been shown that restrictions in the iliopsoas can mess with your ability to properly activate other muscles in your hip and thigh, like your glute max [2].
So what is one to do?
That’s where we come in…
Step 1: Active Self-Myofascial Hip Flexor Release
This first method will help you release the tightness and tension in your hip flexors as you improve your mobility and range.
But best of all, it does it in a way that reminds the neuromuscular system to fire up the glutes and allow the hip flexors to completely relax. This reciprocal inhibition leads to more effective mobility gains, and the neuromuscular re-education can start to undo some of those improper firing patterns your body has developed over hours of sitting.

- Get into a half kneeling position with your right foot forward and your left knee down
- Place your thumb on your hip bone (or iliac crest), then drive your thumb down and in to find your iliacus muscle
- Flex your hip by lowering your chest toward the ground
- Squeeze your left glute and begin to drive into hip extension – lifting your chest back up and pushing your hip forward
- Keep pressure on your iliacus through your thumb as you move to end range
- Relax, move your thumb slightly to find a different area of the muscle and repeat
You can repeat the whole drill, this time finding your psoas major. To do so, take 3 fingers and press from the side of your torso at about the height of your belly button. Press your fingers down and in towards midline – trying to get under your rectus abdominis or 6-pack muscle.
Complete 3-6 reps on both sides for each muscle.
Step 2: Dead Bug Hip Bridge
Now that we’ve improved your hip flexor mobility, let’s tackle hip flexor strength and function.
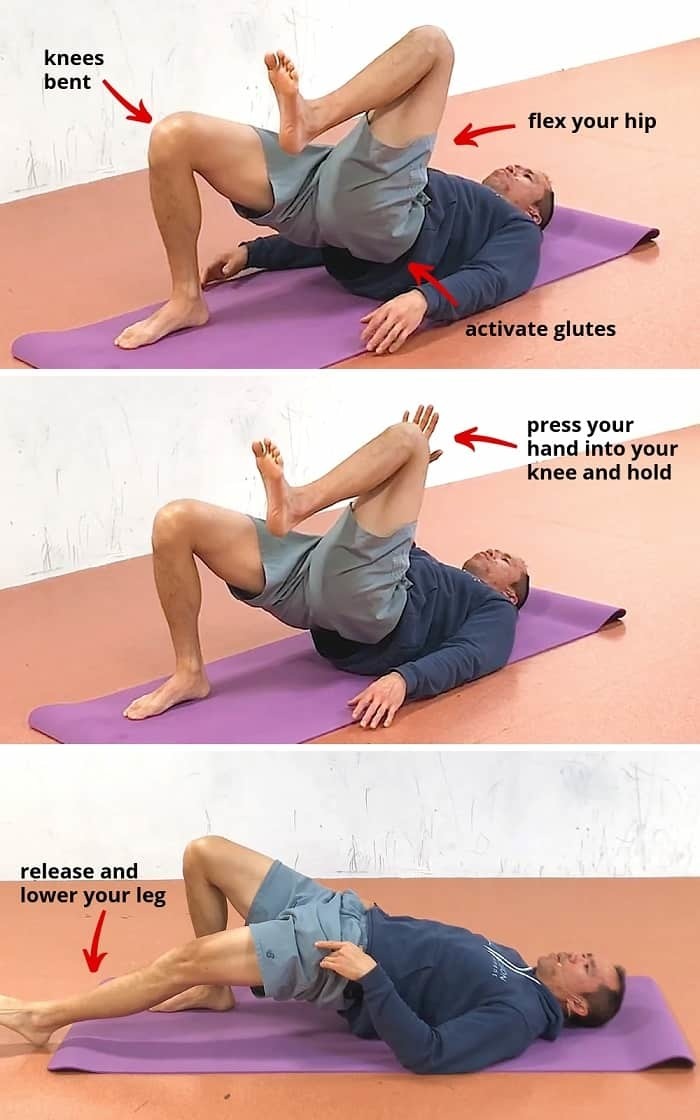
- Lie supine with your feet planted and knees bent
- Activate your glutes and lift up into a bridge
- Flex your right hip to bring your right thigh close to your chest while keeping both hips level
- Place your left hand on your right knee and press them together in an isometric hold for 5 breaths
- Release and straighten your right leg out with control, extending the right leg and maintaining the lifted position of both hips
- Let the right heel hover over the ground then touch down lightly
- Bring your right foot in and repeat on the other side
Complete 3-6 reps on each side, alternating side-to-side and taking a breather whenever you need it.
This method allows you to take your hip generally and your iliopsoas muscle specifically through a full range of motion. You start with a fully shortened iliopsoas when you are reaching opposite arm toward the flexed hip, and move toward extension and a fully lengthened muscle when your heel is reaching forward with hips high.
This exercise allows you to build strength and control through the muscle’s full range – something that’s hard to do with your basic stretch or strengthening exercise.
It also helps reinforce that proper neuromuscular connection and firing during a very functional pattern of one hip flexed and one extended – i.e., just how you look when you’re sprinting.
This 2 step process is a simple way to improve your iliopsoas function. With step 1, you address structural limitations via Active Self-Myofascial Release and with step 2, strength and control in a functional movement pattern.
You might not have too much of a choice about how much sitting you do – maybe you have to sit at work or you have a long commute – but incorporating these methods can counteract spending so much time in (passive) hip flexion.